With Blood Eagle and Dux Britanniarum on the horizon, it's become time to turn my attention to some Dark Age scenery. And nothing screams Scenery-Suitable-For-Anything-Ancient-to-Medieval more than some Wattle Fencing. To be honest, it's something I've wanted to have a go at making for a long time.
Now don't get me wrong, Perry Miniatures have sculpted a lovely set of wattle fencing tooled by Renedra. Two sprues will get you about 5 feet of fencing, which is probably more than enough for most gaming purposes. And at a cost of around £10, it isn't going to break the bank.
However, with a perennial gaming budget of very little, I have to decide whether a tenner is best spent on scenery or miniatures. And since I have more success with scenery than I have with sculpting, you can guess where I choose to put my funds!
But there's also another reason for me taking this route. And it's possibly a little OCD. Gaps. Wattle fencing has gaps in it. The plastic wattle fencing doesn't. This could either be a necessary part of the moulding process, or a question of scaling down. I don't know abut these things. I also know that there are some excellent tutorials online, either on blogs or on YouTube showing how to go about making this sort of thing from scratch. From the ones that I've seen, the common material for the wattle itself is either 2.5mm wide strips of thin card or the kind of gardening wire used to keep plants upright with the help of those green sticks. It's a thin piece of wire sandwiched in plastic. It reminds me of those white plastic wire tiers I used to get on my packed lunch at primary school in the 70's. These all look good, and produce something that looks virtually identical to the Perry/Renedra plastic kit.
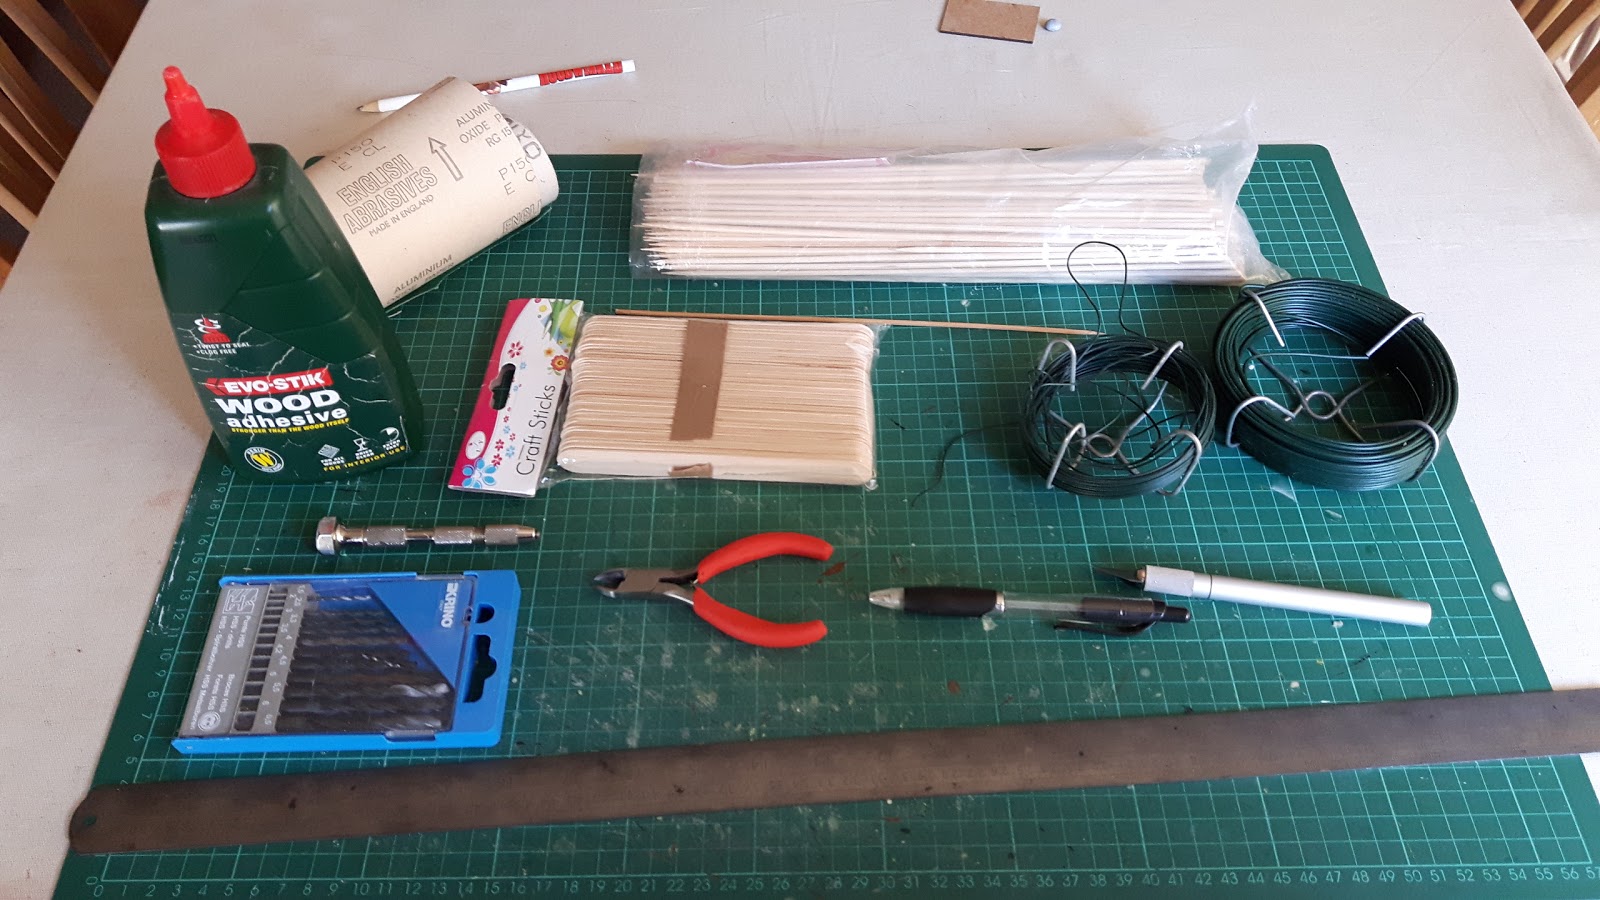
So after much over-thinking (some of which wasn't long enough as we'll see soon enough) I assembled what I thought were all the things I'd need.
 I'm using jumbo ice lolly sticks. I managed to get a packet of 50 of these for £1 post free on eBay. I won't need to use that many, but I recon at that price it's less than the cost of a car journey to my craft shop, let alone the parking and cost of the item. Plus, I can use them for lots of other types of fences and walls.
 The first thing I did was to draw a line down the middle and use my set square to mark off 45 degree angles to either side of the ends. This'll enable them to form right angles. I also marked in 1/8th of an inch from each end, and divided the remaining distance in 1/2 inch increments. Save for one, which was 5/8ths long. I did this longer distance at different places on each stick.
 Then I took my pin vice and drilled out the holes for my upright poles. As you can see in the above photo, this makes the base sit all wonky. This isn't a problem however as a quick sanding will solve it. I didn't do that at this point though, because the next stage will make you need to do it again anyway. It's probably worth pointing out that you need to pick a drill bit that is slightly narrower than the dowel you're using for the uprights. This makes for a tight fit that holds them in place.
 I'm cutting my upright posts from a bamboo skewer. I've seen tutorials use cocktail sticks for this part, but I'm using what I have to hand. Which coincidentally is not the contents of that big packet you can see in the first photo. I have two packets of skewers. Interestingly, there is a big difference in the width of the two as you can see in the next photo.

 At this point I realised I had forgotten to sand down the edges of the bases. I'm glad I remembered at this point as it would have been so much more difficult to do this once the posts had gone in.
 Then it was simply time to apply a small dab of PVA over each of the drilled holes in the base and then wedge each vertical post in place. the end result looks like this:
 It's perfectly natural that some of the posts fit a little further into the base than others. This lack of uniformity makes the model look more natural.
 This is the point where you have to wait for the glue to dry. Properly. Give it a couple of hours. If you don't, it's not going to hold when you add your wattle of choice. Believe me, I know.
Now don't get me wrong, Perry Miniatures have sculpted a lovely set of wattle fencing tooled by Renedra. Two sprues will get you about 5 feet of fencing, which is probably more than enough for most gaming purposes. And at a cost of around £10, it isn't going to break the bank.
However, with a perennial gaming budget of very little, I have to decide whether a tenner is best spent on scenery or miniatures. And since I have more success with scenery than I have with sculpting, you can guess where I choose to put my funds!
But there's also another reason for me taking this route. And it's possibly a little OCD. Gaps. Wattle fencing has gaps in it. The plastic wattle fencing doesn't. This could either be a necessary part of the moulding process, or a question of scaling down. I don't know abut these things. I also know that there are some excellent tutorials online, either on blogs or on YouTube showing how to go about making this sort of thing from scratch. From the ones that I've seen, the common material for the wattle itself is either 2.5mm wide strips of thin card or the kind of gardening wire used to keep plants upright with the help of those green sticks. It's a thin piece of wire sandwiched in plastic. It reminds me of those white plastic wire tiers I used to get on my packed lunch at primary school in the 70's. These all look good, and produce something that looks virtually identical to the Perry/Renedra plastic kit.
So after much over-thinking (some of which wasn't long enough as we'll see soon enough) I assembled what I thought were all the things I'd need.


So I went for the narrower of the two. I cut the skewer into 2cm long sections.


You may remember in the first photo I had two reels of plastic coated wire. I bought them years ago from B&Q. Back then (long before the blogiverse existed) I used them to form tree armatures. Sadly the jungle trees I made have long since perished and my wargames tables are now populated with Woodland Scenics trees, from those halcyon days of yore when I had cash for such things.
I had thought to use both guages of wire for my wattle. However, I soon realised that at barely pushing 1mm diameter, the smaller of the two wires was just too narrow for my fencing. If it had been closer in size to the larger one, it would have provided the variation I had been wanting. Unfortunately they were too different when placed together. It just looked wrong. Another mitigating factor is the amount of wire I would have had to use if I made the fencing just from the narrower guage wire. I would never have had enough. So the larger guage it is then...
When it comes to applying the wire, I soon found that it was easiest to do so working on the top few millimetres of the posts. If you try and weave something as thick as this lower down, you'll enter a whole world of hurt. You'll maybe even uproot uproot a post. And that'll sap your joy no end...!
I cut the wire 1-2" longer than my bases to allow for the extra distance caused by the weaving. Admittedly, I soon began to figure out how long I'd need without measuring the distance.
Once you've got the wire woven around the posts, the next thing you need to do is to push it down. I did this gradually, alternating between each end and then the middle. You need to keep an eye on the posts and base, making sure that the tension doesn't pull a post in an alarming angle or warp the base so it no longer sits flat on the ground.
 You soon get into a groove with this. Pretty soon I had seven pieces of wire on the posts. I decided to add an eighth just to make it look fuller.
 And I was so happy with these two that I soon set to work making another couple. This is a clear sign that I'm happy with the result.
 While I was making the next two, I began to realise that the wires needed to be cut back further.
 I then added a dab of super glue to each end of the wire and let it pool onto the end posts. It's important not to add too much, but this makes sure that the wires will stay in place. If you have a go at doing this yourself, you may find the top wire has a tendency to want to set itself free of the posts. Let the glue don Properly before you go on to the next stage.


I've seen some tutorials add PVA to the fence to fix the whole thing. I decided against this as I'm relying on the super glue to hold everything. I didn't want to use PVA as well in case it pooled in some of the gaps and ruined the see through effect I'm trying to replicate.
 With the wire in place, I turned my attention to the bases once more as it was time to add my base mix. To do this I simply squeezes a narrow line of PVA onto each side of the base as you can see in the above photo. I then used a small brush to push a small amount right upto the fencing and then applied the rest over the base, making sure that I covered the edges of the base as well. I then dipped it into my base mix box, tapped off the excess and put it to one side.
 I then used another brush to brush away the loose sand that had decided to hang onto the wattle despite the absence of glue.
 And there you have it! The first completed section of wattle fencing. I'll post again when time permits me to paint and flock them. I'll also need to make some more sections with gates and some half lengths to add variety.


Thanks for stopping by!
Comments
Post a Comment